The post FDM vs. SLA vs. SLS: Which 3D Printing Technology Should You Choose? appeared first on IN3DTEC | Prototyping & On-demand manufacturing services.
]]>The post FDM vs. SLA vs. SLS: Which 3D Printing Technology Should You Choose? appeared first on IN3DTEC | Prototyping & On-demand manufacturing services.
]]>The post Top 5 Design Tips for Stronger 3D Printed Parts appeared first on IN3DTEC | Prototyping & On-demand manufacturing services.
]]>Whether you’re creating prototypes or functional end-use components, ensuring strength and durability in your 3D printed parts is essential. Good design can significantly enhance part performance, reduce failure rates, and make your prints more reliable. Here are the top 5 design tips to help you get stronger, more resilient 3D printed parts.
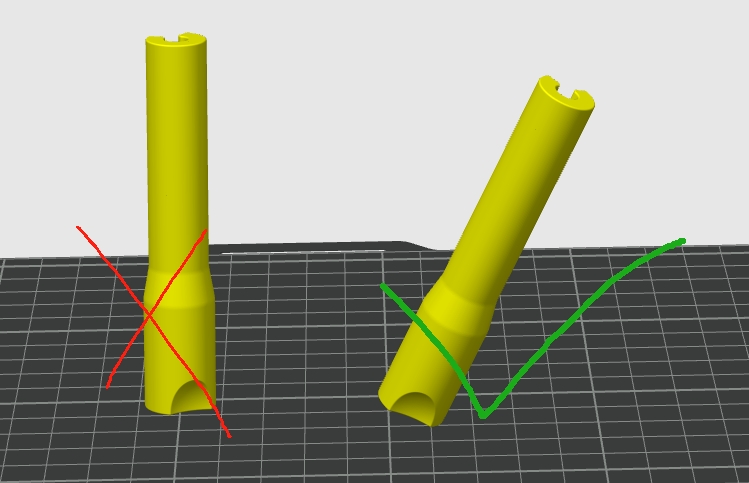
- Optimize Print Orientation
Layer adhesion is typically the weakest point in any 3D printed part. To maximize strength, orient your part so that the layers run perpendicular to the direction of the applied forces. For example, if the part will endure vertical stress, consider printing it lying down so the layers stack horizontally relative to the stress.
Pro Tip: Use simulation tools to predict stress points and align your model accordingly.
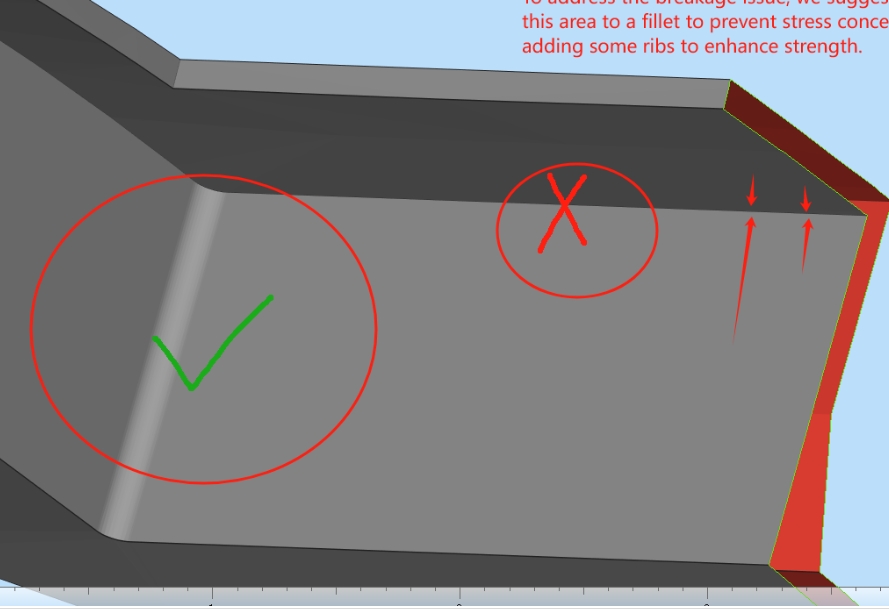
- Use Fillets Instead of Sharp Corners
Sharp corners create stress concentration points which can lead to cracking. Adding fillets (rounded edges) not only improves the strength by distributing stress more evenly but also enhances the printability by reducing potential printing errors.
Pro Tip: A fillet radius of 1-2 mm is often sufficient for improving part integrity.
- Increase Wall Thickness and Infill Density
One of the simplest ways to strengthen your part is by adjusting wall thickness and different infill settings. A thicker shell and higher infill percentage will create a sturdier structure. However, this also increases material use and print time, so find a balance based on your part’s function.
Pro Tip: For functional parts, use at least 2 mm wall thickness and 50% infill or higher.
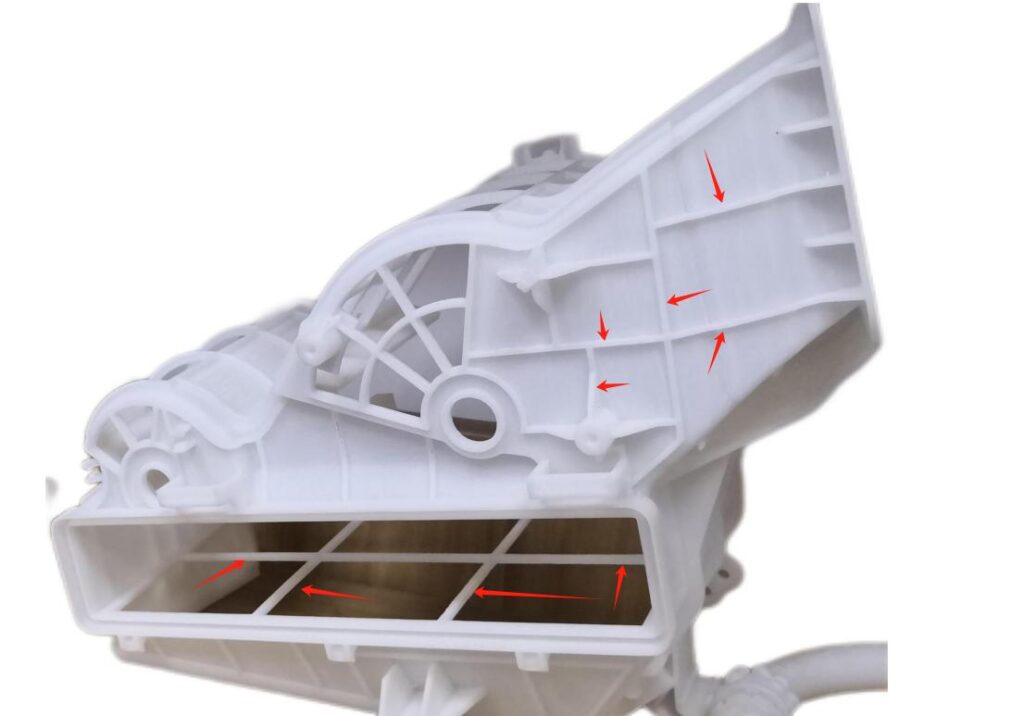
- Add Ribs and Gussets for Structural Support
Instead of just increasing infill, adding structural features like ribs (vertical walls) and gussets (triangular supports) can reinforce weak sections without significantly increasing weight or print time. These features are especially helpful in load-bearing areas.
Pro Tip: Integrate ribs along flat surfaces or near holes to reduce flex.
- Choose the Right Material
Material selection is key. PLA might be easy to print, but it lacks the toughness of materials like PETG, ABS, or Nylon. If you’re printing functional parts that will be stressed, exposed to impact, or require flexibility, choose a material that meets those needs.
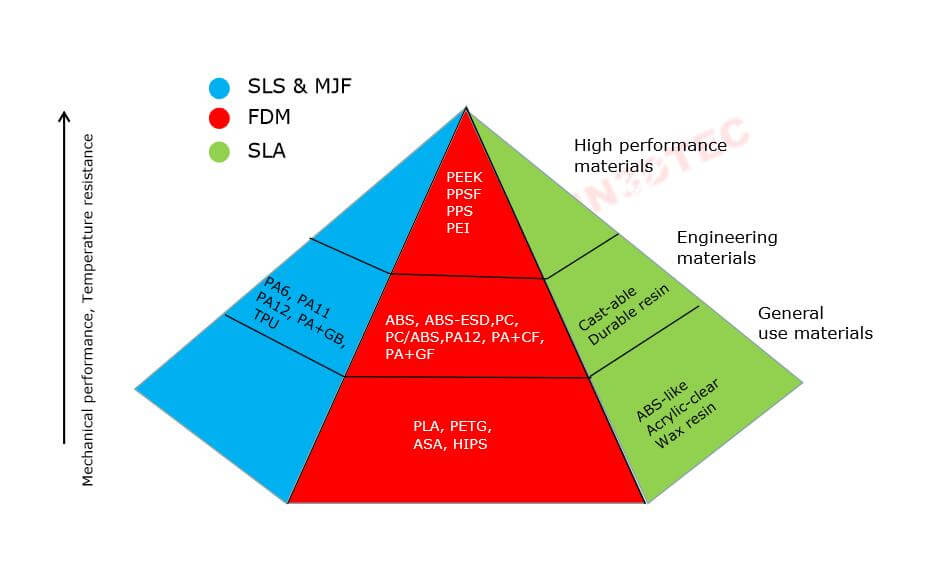
Pro Tip: Consider carbon fiber-reinforced filaments for high-stress, lightweight applications.
Read more: Material Select Guide for 3D Printing
Conclusion
Stronger 3D printed parts begin with smarter design choices. By carefully considering print orientation, geometry, and material selection, you can significantly enhance the performance and longevity of your parts. Have a part you’re designing? Contact us to review your files and recommend the best settings and materials for maximum strength.
The post Top 5 Design Tips for Stronger 3D Printed Parts appeared first on IN3DTEC | Prototyping & On-demand manufacturing services.
]]>The post Sustainable Solutions: Biodegradable 3D Printing Materials and Services appeared first on IN3DTEC | Prototyping & On-demand manufacturing services.
]]>The post Sustainable Solutions: Biodegradable 3D Printing Materials and Services appeared first on IN3DTEC | Prototyping & On-demand manufacturing services.
]]>The post What to Consider When Selecting a Metal 3D Printing Service appeared first on IN3DTEC | Prototyping & On-demand manufacturing services.
]]>The post What to Consider When Selecting a Metal 3D Printing Service appeared first on IN3DTEC | Prototyping & On-demand manufacturing services.
]]>The post How to Export Your CAD Files for a Smoother Surface Finish appeared first on IN3DTEC | Prototyping & On-demand manufacturing services.
]]>The post How to Export Your CAD Files for a Smoother Surface Finish appeared first on IN3DTEC | Prototyping & On-demand manufacturing services.
]]>The post Top Free Tools for Repairing STL Files in 3D Printing appeared first on IN3DTEC | Prototyping & On-demand manufacturing services.
]]>The post Top Free Tools for Repairing STL Files in 3D Printing appeared first on IN3DTEC | Prototyping & On-demand manufacturing services.
]]>The post Can You Electroplate 3D Prints? A Guide to Metallic Finishes appeared first on IN3DTEC | Prototyping & On-demand manufacturing services.
]]>The post Can You Electroplate 3D Prints? A Guide to Metallic Finishes appeared first on IN3DTEC | Prototyping & On-demand manufacturing services.
]]>The post 100 Cool & Useful Things, ideas to 3D Print for November 2024 appeared first on IN3DTEC | Prototyping & On-demand manufacturing services.
]]>-
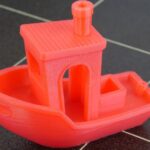 3D BENCHY 1
CreativeTools 3DBenchy is a 3D model specifically designed for testing and benchmarking 3D printers.
-
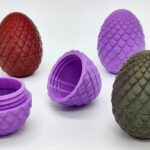 Threaded Dragon Egg 2
It's a threaded dragon egg, great for Easter egg hunts, gifts, and Game of Thrones fans.
-
 Low Poly Howling Wolf 2.0 3
Low Poly Howling Wolf. Print Your Pack!! Great for Testing Input Shaping!!
-
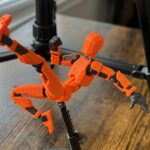 DUMMY 13 Printable Jointed Figure (BETA FILES) 4
Another new addition to the Lucky 13 family
-
 Stackable beer crate 5
Customizable (for CAD owners) & stackable beer crate for batteries
-
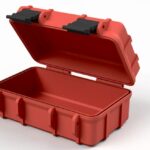 Rugged Box (Parametric) 6
Fully parameterized rugged tool box
-
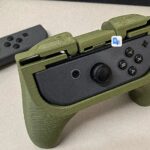 Joycon Controller with Trigger buttons. 7
3D ergonomic controller for Nintendo switch Joycons left and right.
-
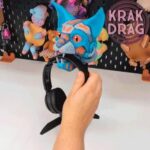
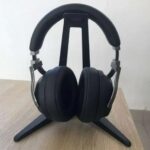 Headphone stand 8
Headphone stand
-
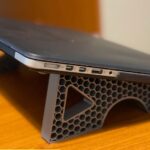 Laptop Stand 9
Laptop stand, a simple and ergonomic stand, perfect for a laptop 13" or 15".
-
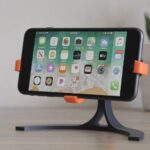
 Phone/Tablet Stand 10
This phone/tablet stand is designed to be as universal as possible, print in place, and fold flat while being very…
-
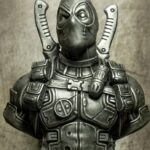 Deadpool Bust 11
Fan art sculpt of Deadpool. Thanks for printing!
-
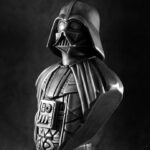 Darth Vader Bust 12
Cool Art of Dart Vader Bust
-
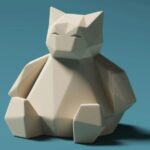 Low-Poly Snorlax 13
Easy-to-print Snorlax design. No support material needed
-
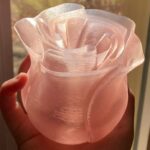 Spiral Vase Rose 14
A rose designed to print in spiral vase mode.
-
 Valentine Rose of Love 15
For your Valentine's Day

-
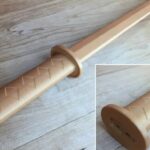 Collapsing Katana 16
This is a collapsing Katana sword designed to be printed as one part. Its only 182mm high when printed but expands to over 825mm in total length!
-
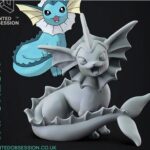 Vaporeon - Pokemon - Fan Art 17
 -
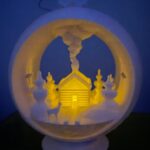 Snow Globe Votive Ornament - Winter Cabin 18
Snow Globe Votive Ornament - Winter Cabin Insert an LED tea light candle (<38mm dia) in the base to light up the cabin.
-
 Adjustable leg furniture 19
Adjustable leg for furniture
-
 Dremel bit holder 20
60 bit holes Circular container: 45mm in diameter Squared container: 64mm x 45mm Total size: 120mm x 120mm x 15mm
-
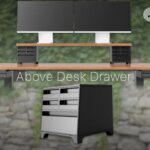 Above Desk Drawer 21
You must REALLY hate all that extra filament laying around to be looking at these.. The chassis take about a kg to print, and the drawers, feet, and hats take another like 600g.
-
 Soft Tape Measure Spool 22
Soft Tape Measure Spool for a 5/8" wide, 5ft long soft tape measure. Super glue end of pin into core.
-
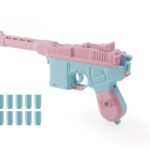 Toy Shooter 23
This is a cartoon-style toy shooter, without firing capability and cannot be modified, making it safe to play. It features intricate design that allows for functions such as blowback shell ejecting action, locking the slide back on an empty magazine, trigger-hammer interaction, and a safety mechanism.
-
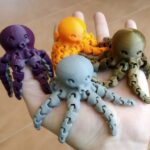 Cute Mini Octopus 24
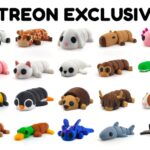
Cute Mini Octopus, the original! It's designed so it can be printed at once. No assembly or supports required.
-
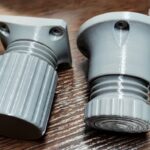
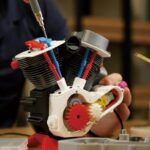 Engine Model 005 25
This is a V-twin engine model that consists of various parts like a crankshaft, connecting rods, camshafts, gears, and a throttle valve, among others. It can replicate the functioning of a real engine.
-
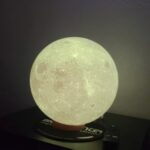 SVS NASA Moon Globe 26
This has an 80mm opening on the base to set on a 10cm LED lighted puck.
-
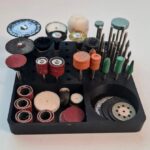
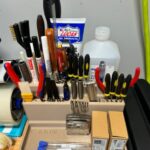 Catch All Desk Organizer 27
I couldn't find a tool organizer for my print station that met my exact needs so I said “to hell with it” and made my own...
-
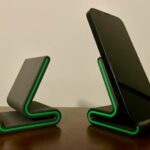 Phone Stand 28
The stand is designed to hold the phone with or without a case. Accents on the side are printed separately and fitted in after being printed.
-
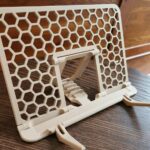 Foldable Book or Tablet Stand 29
Rest your book or tablet on this convenient stand, allowing you to keep your hands free while cooking, working, or studying.
-
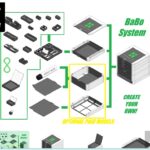 organizer drawer module 30 30
This is the BaBo drawer module 30. The drawer module is the heart of the system as it carries the inserts and is therefore the main page of the system.
-
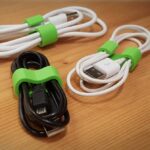
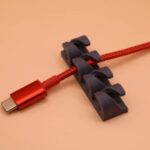
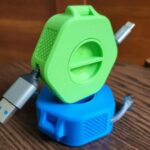 Portable Cable Organizer / Winder 31
A portable cable organizer which is setup as an easy print-in-place and includes a knob on the side for conveniently winding up the cable when you're ready to pack it away.
-
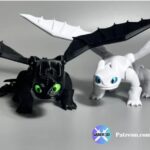 Flexi Toothless Dragon 32
No Supports necessary!
-
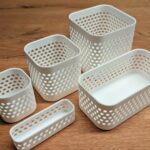 Organizer Box / Boxes 33
The model is designed so that all punch holes are auto-calculated and evenly spaced. No need to fiddle around with manual settings, just define the basic parameters and watch the magic math
 .
. -
 3D Printable Jet Engine 34
I have incorporated several minor design improvements to the parts to improve clearances, ease of printing, and ease of assembly.
-
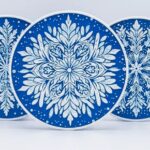 Snowflake Coasters - Hueforge 35
Cool flowers with easy print
-
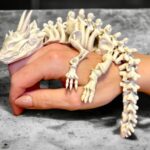 Articulated Skeleton Dragon 36
It's a fun piece of toy that's incredibly flexible, with virtually all joints capable of movement. It has become a huge hit with the kids at home!
-
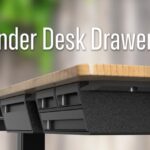 Under Desk Drawers 37
Got some filament to burn? Drawers made to be bolted/ hot glued/ double stick taped to the bottom of a desk or table
-
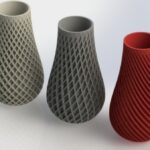 Spiral Vase 38
For Home.
-
 Faceted Chess Set 39
Lorem ipsum dolor sit amet consectetur adipiscing elit dolor
-
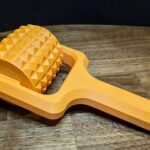
 PUSHER FOR TUBE PASTE 40
Simple & easy to use
-
 Makeup Organizer Box 41
I created a 3D model of a Chinese product. Made on the eye, maybe someone will be useful. The dimensions are visible in the photo. If you want to change the size email me or edit SolidWorks file(which I also had).
-
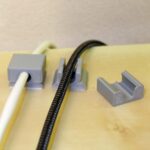
 Cable Clip 42
Had a couple of USB cables lying around so I decided to design a simple cable clip. The wire tension itself together with the curved back holds the cable in place.
-
 Egg Separator (Kitchen) 43
Simple Egg Separator that attaches to the side of your bowl. !Note: V3 Wide is for thicker bowls up to 10mm Safe 3D printing materials for food contact (FDA approved) can be found from IN3DTEC online 3D printing store
-
 Made with Love Bokeh Kit 44
Slick style meets practical engineering. Our Photography Gear puts the fun in functional with good-looking gear that streamlines your workflow and fuels your creativity.
-
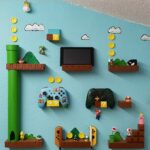 Super Mario World Nintendo Switch Controller Pro Joy Con Wall Holder 45
I have some Switch Pro Controller but didn't found holder for the wall I liked. So I got the idea to do a holder as a brick block with different designs. Then I thought, why not doing a complete wall with all your Switch stuff. And so here we go. I did a complete Super Mario World with holders for everything for the Switch.
-
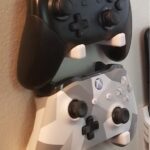 Controller Mount (Switch/Xbox/PS4/+) 46
Minimalistic design meant to function for most all controller types. Requires no support material and prints in one quick and easy model. Includes both a narrow and wide version. In testing various controllers, some secured a bit nicer to a narrow version. Though the Wide version is the one pictured in the post print images.
-
 Cable Gland for Desktop Sit-Up 47
This two-piece cable gland is fixed with double-sided foam or a screw. I designed it as part of the realization of a motorized sitting/standing desk.
-
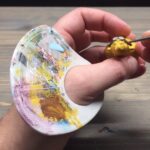 Petite Paint Palette 48
This petite paint palette was thrown together when I ran out of 3D rubble to use as a palette. Designed to shorten the distance between paint and a held item, it has worked great for all my acrylic mini painting. It’s a quick print that speeds up painting, so I had share.
-
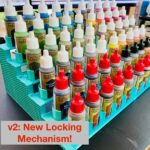 Modular holder for miniature paints and brushes 49
In the pictures, you can see examples of the components printed as usual, or -- simply to make it all look a bit more interesting -- with no top and bottom layers. To get the honeycomb pattern, you can print with IN3DTEC use 20% honeycomb infill.
-
 Watercolor Palette 50
Release your inner artist with this perfectly-portioned palette, designed for watercolors but useful for other paints as well. Simply add color, swirl your brush, and start your next masterpiece.
-
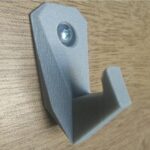 Strong Arm Hook 51
Strong hook with one screw holes. Height - 54 mm Width - 30 mm Depth - 30mm Holes dia 4mm
-
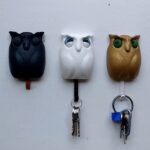 Just eyes for Owl - wall key holder 52
Cool design to place your keys at home.
-
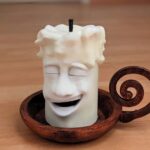 Funny Cartoon Christmas Candle ( no 4 of 4) 53
Cartoon-Style Christmas 3D print Candles, that you can use for your christmas decorations!
-
 Striped Tea Candle Holder 54
Cool 3D Print candle for Christmas!
-
 Tealight holder 55
This is a small but elegant 3D Print tealight holder.
-
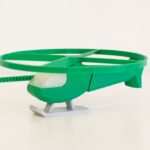 Multi-Color Flying Helicopter Toy 56
Multi-Color 3D Print Flying Helicopter Toy. Ideal for Children and education. For Fun.
-
 PRINT-IN-PLACE PHONE HOLDER 57
It is a cool Fully 3D-Printed Phone Holder for your desk, car or Space station
-
 Mechanical Quick Grab/Release Phone Stand 58
This 3D Print stand allows multiple viewing angles and best of all has a quick grab/release mechanism that grabs and locks the phone in when you let go and releases when you pick up the phone.
-
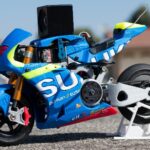 2016 Suzuki GSX-RR 1:8 Racing RC MotoGP Version 2 59
This 1/8 size Racing Motorcycle is far more advanced and has been completely redesigned with knowledge gained from actual RC motorcycle designers and racing enthusiasts whose invaluable input was incorporated into the design. This is not meant to be a good 3d printed RC motorcycle, but a serious new RC Motorcycle variant that people can build, design and race at the track.
-
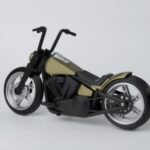 Harley Davidson - Custom Fat Boy Style 60
Harley Davidson - Custom Fat Boy Style - Scale 1:12 Fully printable model kit Spinning wheels Functional steering The design is divided in many different parts in order to allow printing different parts with different color This model does not need any additional non-3dprinted parts
-
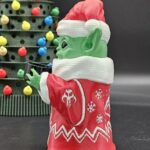 Christmas Grogu 61
Supports needed for the cup and the edge of his sleeves. Pre-Supported .lys and .stl files for resin included
-
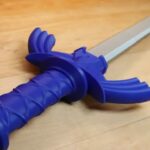 Collapsing Master Sword with Replaceable Blade 62
Unlike the 3D Print-N-Place version, the pommel on the hilt of this Master Sword is threaded which allows the blade to be printed separately and inserted. The assembled hilt is 250mm long but the blade extends to a length of 870mm long in total!
-
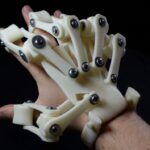 3D Printed Exoskeleton Hands 63
3D printed exoskeleton hands that I made for a bit of fun.
-
 Starcraft Marines 64
Starcraft fanart. 3 Marine models.
-
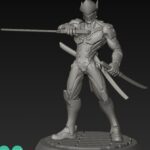 Genji Fan Art 65
Comes with Supported and Unsupported stl. Base made to 3d print lying flat, with supported underbelly.
-
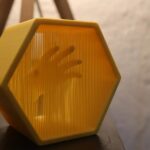
 3D Printed one hand book holder 66
This object will simplify your life, allowing you to read your books with one hand and without any thumb cramp !
-
 Malte Fürstenberg 67
Bananaaaaaa, you will like this cool 3D print. It Can be 3D printed with IN3DTEC full color printing service.
-
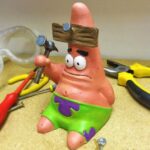 "Hammered" Patrick! 68
Inspired by Patrick Star, SpongeBob's best friend! Master of the art of doing nothing at all, Patrick is one of the funniest characters ever created! It Can be 3D printed with IN3DTEC full color printing service.
-
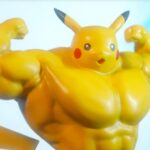 Ultra swole Pikachu 69
Ultra swole Pikachu! I created this for fun. Sculpted in Zbrush, part separated and repaired with Maya and Meshmixer. Can be 3D printed with IN3DTEC full color printing service.
-
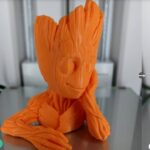 Baby Groot flower pot 70
Cool 3D prints and innovate creation
-
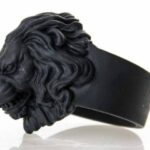 Lion Ring for comp 71
Lorem ipsum dolor sit amet consectetur adipiscing elit dolor
-
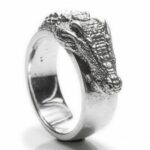 Crocodile Ring 72
This design is ideal for 316L Steel 3D printing, with stone polishing. You can find this from IN3DTEC online quote system
-
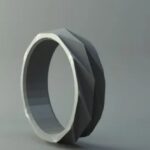 Ring - Folded faces 73
This design is ideal for 316L Steel 3D printing, with stone polishing. You can find this from IN3DTEC online quote system
-
 Crow's Skull 74
This design is ideal for 316L Steel 3D printing, with stone polishing. You can find this from IN3DTEC online quote system
-
 Santa and Snowman - Christmas multicolor knitted container 75
Santa is printed in 4 colors with 1 AMS unit. (the belt buckle was painted with yellow acrylic paint, if you have another AMS unit you can add the yellow color).
 You can find multiple color printing servcie from IN3DTEC.
 -
![Stitch [Lilo and Stitch]](https://www.in3dtec.com/wp-content/uploads/2024/08/76-150x150.jpg) Stitch [Lilo and Stitch] 76
Stitch [Lilo and Stitch] 76Today we're bringing you a 3D printed Stitch from the Disney movie Lilo and Stitch. Stitch is such an iconic character, and it was really fun to make into a full figure.
-
 Controller Mount (Switch/Xbox/PS4/+) - No supports/one piece 77
Minimalistic design meant to function for most all controller types. Requires no support material and prints in one quick and easy model. Includes both a narrow and wide version. In testing various controllers, some secured a bit nicer to a narrow version. Though the Wide version is the one pictured in the post print images.
-
 Smaller Print-in-place Massage Roller 78
Ideal for body massage, you can select IN3DTEC printing service for customized colors.
-
 Cable holder 79
Summary USB cable holder.
-
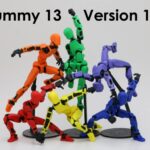 Dummy 13 - version 1.0! 80
Dummy 13 is a 3D printable action figure designed for super expressive articulation and infinite customization, accessible to anyone with a 3D printer.
-
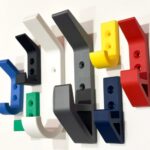 Wall hook 81
8 different wall hooks in different size and sturdiness.
-
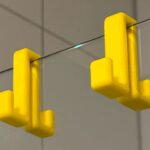 Bath Glass Shower Hook 82
A hook for bathroom glass shower available in various glass thickness and width.
-
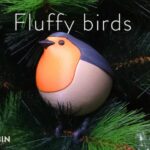 Fluffy Birds 83
Have you ever wished for a little companion to keep you company at your desk? Perhaps you’ve just found one! Here’s a fluffy little bird—a robin, but it doesn’t have a name yet. You can print it out and give it a name!
-
 STomHacks 84
No support required
-
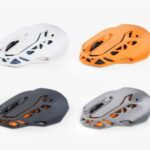 Wireless Mouse 85
This 3D-printed mouse features a futuristic hollow shell design that showcases its internal structure. The generative design of the shell is something only achievable through 3D printing. Our industrial designers have fully harnessed the advantages of 3D-printed structures to bring you this stunningly crafted mouse.
-
 Led Lamp 86
This LED lamp project offers two types of 3D printed lampshades. Type A features a hollow and angular design, while Type B showcases textured and wavy patterns. We recommend to select Translucent material by using FDM or SLA 3D printing from IN3DTEC 3D printing service.
-
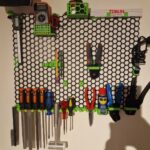 Honeycomb Wall 87
You can connect the basic parts of the wall together. You can connect it also with printable parts which can be used in various ways (you can use it for screwing to the wall, you can use it as a holder for hanger or as a holder for hook).
-
 12-hole playable Ocarina 88
As Gabriel_Knight pointed out, it might actually better to print this with the pointy end down, not up, as I initially thought.
-
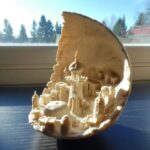 Moon City 2.0 89
This is the latest (2.0) free version of my Moon City
-
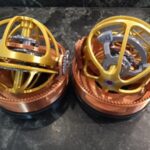 TT violent tourbillon 90
This is a 3D printed three-axis tourbillon model whose design is inspired by the tourbillon in the Jacob & Co. Twin Turbo Furious watch. A tourbillon is a mechanism used to counteract the effects of gravity within a watch. This sophisticated model includes an escape wheel, a three-axis frame and a base with integrated motor. It operates on the same principle as a traditional tourbillon watch.
-
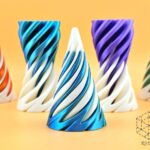 V3 Series - Impossible Penetration Cone 91
This is an updated version of the V3 Series Vortex Thread/Impossible Cone This version is slightly shorter in length, 72mm, and slightly wider, 42mm, and feels better than the original version. Clearances have been optimized and exterior details add to the appeal. NOTE: Cone dimensions are different than other V3 cones I have made
-
 Infinite Cube 92
Introducing the Infinity Rubik's Cube, a charming fusion of geometry and minimalism! Its 111 mm size brings a touch of modern elegance to any space. Whether it's a centerpiece on your desk, bookshelf or living room, it's more than decoration - it's an engaging conversation piece and a tribute to endless possibilities!
-
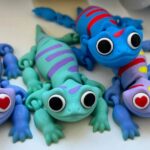 Cute lizard with movable joints 93
This incredibly cute 3D printed lizard! It's more than just a model; it's a fun-filled project where you can assemble your own colorful friends.

-
 Charming Dinosaur 94
Introducing the most charming dinosaur you'll ever meet - the delightfully chubby and irresistibly adorable dino!

 With its plump, soft design and fully movable joints, this little creature is not just a decoration; it’s a heartwarming companion that will bring joy to any space. Effortlessly easy to print and impossibly easy to love, this lovable dinosaur is an essential addition to your collection! Don’t miss out on the chance to brighten up your surroundings with its cheerful presence!
 -
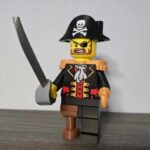 Large building blocks * Captain Brick Beard * Pirate * 500% 95
This model is designed for multiple color 3d printing.
-
 Solar System Lithophane Planet Lamp Collection 96
After more than two years of designing and prototyping, I am very happy to finally present you the Solar System Planet Lamp Collection. In the course of this, I printed over 50 lamp prototypes and spent more than 20 kg of Filament
-
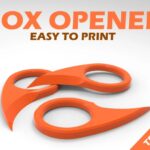 BOX OPENER - TESTED 97
Easy to print - Easy to handle Perfect for openeing your boxes
-
 Articulating Raccoon - No Supports 98
Here is the Raccoon Model! The multicolor and single-color files are included. Even if your slicer isn't compatible with the included 3mf file, the single-color file is designed to be easy to paint in your slicer of choice. Just simply use the fill tool in your slicer to paint the different colors. Enjoy!
-
 CYBER CAT: UNIVERSAL HEADPHONE HOLDER 99
Let the Cyber Cat Bite Your Headphones! This is the Cyber Cat! A Universal Headphone Holder, with movable jaw and retractable teeth!
-
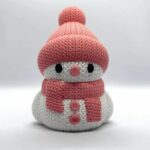 KNITTED SNOWMAN 100
This is a cute knitted Snowman same as your grandma would have knitted for you. This needs no supports to print. No assembly needed after print. Make sure to upload a make after printing. Thank You!
The post 100 Cool & Useful Things, ideas to 3D Print for November 2024 appeared first on IN3DTEC | Prototyping & On-demand manufacturing services.
]]>The post Exploring the Fascinating World of Infill Patterns in 3D Printing appeared first on IN3DTEC | Prototyping & On-demand manufacturing services.
]]>The post Exploring the Fascinating World of Infill Patterns in 3D Printing appeared first on IN3DTEC | Prototyping & On-demand manufacturing services.
]]>The post 100 Innovative 3D Print Projects You Will Love appeared first on IN3DTEC | Prototyping & On-demand manufacturing services.
]]>- 3D BENCHY 1
CreativeTools 3DBenchy is a 3D model specifically designed for testing and benchmarking 3D printers.
- Threaded Dragon Egg 2
It's a threaded dragon egg, great for Easter egg hunts, gifts, and Game of Thrones fans.
- Low Poly Howling Wolf 2.0 3
Low Poly Howling Wolf. Print Your Pack!! Great for Testing Input Shaping!!
- DUMMY 13 Printable Jointed Figure (BETA FILES) 4
Another new addition to the Lucky 13 family
- Stackable beer crate 5
Customizable (for CAD owners) & stackable beer crate for batteries
- Rugged Box (Parametric) 6
Fully parameterized rugged tool box
- Joycon Controller with Trigger buttons. 7
3D ergonomic controller for Nintendo switch Joycons left and right.
- Headphone stand 8
Headphone stand
- Laptop Stand 9
Laptop stand, a simple and ergonomic stand, perfect for a laptop 13" or 15".
- Phone/Tablet Stand 10
This phone/tablet stand is designed to be as universal as possible, print in place, and fold flat while being very…
- Deadpool Bust 11
Fan art sculpt of Deadpool. Thanks for printing!
- Darth Vader Bust 12
Cool Art of Dart Vader Bust
- Low-Poly Snorlax 13
Easy-to-print Snorlax design. No support material needed
- Spiral Vase Rose 14
A rose designed to print in spiral vase mode.
- Valentine Rose of Love 15
For your Valentine's Day
- Collapsing Katana 16
This is a collapsing Katana sword designed to be printed as one part. Its only 182mm high when printed but expands to over 825mm in total length!
- Vaporeon - Pokemon - Fan Art 17
- Snow Globe Votive Ornament - Winter Cabin 18
Snow Globe Votive Ornament - Winter Cabin Insert an LED tea light candle (<38mm dia) in the base to light up the cabin.
- Adjustable leg furniture 19
Adjustable leg for furniture
- Dremel bit holder 20
60 bit holes Circular container: 45mm in diameter Squared container: 64mm x 45mm Total size: 120mm x 120mm x 15mm
- Above Desk Drawer 21
You must REALLY hate all that extra filament laying around to be looking at these.. The chassis take about a kg to print, and the drawers, feet, and hats take another like 600g.
- Soft Tape Measure Spool 22
Soft Tape Measure Spool for a 5/8" wide, 5ft long soft tape measure. Super glue end of pin into core.
- Toy Shooter 23
This is a cartoon-style toy shooter, without firing capability and cannot be modified, making it safe to play. It features intricate design that allows for functions such as blowback shell ejecting action, locking the slide back on an empty magazine, trigger-hammer interaction, and a safety mechanism.
- Cute Mini Octopus 24
Cute Mini Octopus, the original! It's designed so it can be printed at once. No assembly or supports required.
- Engine Model 005 25
This is a V-twin engine model that consists of various parts like a crankshaft, connecting rods, camshafts, gears, and a throttle valve, among others. It can replicate the functioning of a real engine.
- SVS NASA Moon Globe 26
This has an 80mm opening on the base to set on a 10cm LED lighted puck.
- Catch All Desk Organizer 27
I couldn't find a tool organizer for my print station that met my exact needs so I said “to hell with it” and made my own...
- Phone Stand 28
The stand is designed to hold the phone with or without a case. Accents on the side are printed separately and fitted in after being printed.
- Foldable Book or Tablet Stand 29
Rest your book or tablet on this convenient stand, allowing you to keep your hands free while cooking, working, or studying.
- organizer drawer module 30 30
This is the BaBo drawer module 30. The drawer module is the heart of the system as it carries the inserts and is therefore the main page of the system.
- Portable Cable Organizer / Winder 31
A portable cable organizer which is setup as an easy print-in-place and includes a knob on the side for conveniently winding up the cable when you're ready to pack it away.
- Flexi Toothless Dragon 32
No Supports necessary!
- Organizer Box / Boxes 33
The model is designed so that all punch holes are auto-calculated and evenly spaced. No need to fiddle around with manual settings, just define the basic parameters and watch the magic math
. - 3D Printable Jet Engine 34
I have incorporated several minor design improvements to the parts to improve clearances, ease of printing, and ease of assembly.
- Snowflake Coasters - Hueforge 35
Cool flowers with easy print
- Articulated Skeleton Dragon 36
It's a fun piece of toy that's incredibly flexible, with virtually all joints capable of movement. It has become a huge hit with the kids at home!
- Under Desk Drawers 37
Got some filament to burn? Drawers made to be bolted/ hot glued/ double stick taped to the bottom of a desk or table
- Spiral Vase 38
For Home.
- Faceted Chess Set 39
Lorem ipsum dolor sit amet consectetur adipiscing elit dolor
- PUSHER FOR TUBE PASTE 40
Simple & easy to use
- Makeup Organizer Box 41
I created a 3D model of a Chinese product. Made on the eye, maybe someone will be useful. The dimensions are visible in the photo. If you want to change the size email me or edit SolidWorks file(which I also had).
- Cable Clip 42
Had a couple of USB cables lying around so I decided to design a simple cable clip. The wire tension itself together with the curved back holds the cable in place.
- Egg Separator (Kitchen) 43
Simple Egg Separator that attaches to the side of your bowl. !Note: V3 Wide is for thicker bowls up to 10mm Safe 3D printing materials for food contact (FDA approved) can be found from IN3DTEC online 3D printing store
- Made with Love Bokeh Kit 44
Slick style meets practical engineering. Our Photography Gear puts the fun in functional with good-looking gear that streamlines your workflow and fuels your creativity.
- Super Mario World Nintendo Switch Controller Pro Joy Con Wall Holder 45
I have some Switch Pro Controller but didn't found holder for the wall I liked. So I got the idea to do a holder as a brick block with different designs. Then I thought, why not doing a complete wall with all your Switch stuff. And so here we go. I did a complete Super Mario World with holders for everything for the Switch.
- Controller Mount (Switch/Xbox/PS4/+) 46
Minimalistic design meant to function for most all controller types. Requires no support material and prints in one quick and easy model. Includes both a narrow and wide version. In testing various controllers, some secured a bit nicer to a narrow version. Though the Wide version is the one pictured in the post print images.
- Cable Gland for Desktop Sit-Up 47
This two-piece cable gland is fixed with double-sided foam or a screw. I designed it as part of the realization of a motorized sitting/standing desk.
- Petite Paint Palette 48
This petite paint palette was thrown together when I ran out of 3D rubble to use as a palette. Designed to shorten the distance between paint and a held item, it has worked great for all my acrylic mini painting. It’s a quick print that speeds up painting, so I had share.
- Modular holder for miniature paints and brushes 49
In the pictures, you can see examples of the components printed as usual, or -- simply to make it all look a bit more interesting -- with no top and bottom layers. To get the honeycomb pattern, you can print with IN3DTEC use 20% honeycomb infill.
- Watercolor Palette 50
Release your inner artist with this perfectly-portioned palette, designed for watercolors but useful for other paints as well. Simply add color, swirl your brush, and start your next masterpiece.
- Strong Arm Hook 51
Strong hook with one screw holes. Height - 54 mm Width - 30 mm Depth - 30mm Holes dia 4mm
- Just eyes for Owl - wall key holder 52
Cool design to place your keys at home.
- Funny Cartoon Christmas Candle ( no 4 of 4) 53
Cartoon-Style Christmas 3D print Candles, that you can use for your christmas decorations!
- Striped Tea Candle Holder 54
Cool 3D Print candle for Christmas!
- Tealight holder 55
This is a small but elegant 3D Print tealight holder.
- Multi-Color Flying Helicopter Toy 56
Multi-Color 3D Print Flying Helicopter Toy. Ideal for Children and education. For Fun.
- PRINT-IN-PLACE PHONE HOLDER 57
It is a cool Fully 3D-Printed Phone Holder for your desk, car or Space station
- Mechanical Quick Grab/Release Phone Stand 58
This 3D Print stand allows multiple viewing angles and best of all has a quick grab/release mechanism that grabs and locks the phone in when you let go and releases when you pick up the phone.
- 2016 Suzuki GSX-RR 1:8 Racing RC MotoGP Version 2 59
This 1/8 size Racing Motorcycle is far more advanced and has been completely redesigned with knowledge gained from actual RC motorcycle designers and racing enthusiasts whose invaluable input was incorporated into the design. This is not meant to be a good 3d printed RC motorcycle, but a serious new RC Motorcycle variant that people can build, design and race at the track.
- Harley Davidson - Custom Fat Boy Style 60
Harley Davidson - Custom Fat Boy Style - Scale 1:12 Fully printable model kit Spinning wheels Functional steering The design is divided in many different parts in order to allow printing different parts with different color This model does not need any additional non-3dprinted parts
- Christmas Grogu 61
Supports needed for the cup and the edge of his sleeves. Pre-Supported .lys and .stl files for resin included
- Collapsing Master Sword with Replaceable Blade 62
Unlike the 3D Print-N-Place version, the pommel on the hilt of this Master Sword is threaded which allows the blade to be printed separately and inserted. The assembled hilt is 250mm long but the blade extends to a length of 870mm long in total!
- 3D Printed Exoskeleton Hands 63
3D printed exoskeleton hands that I made for a bit of fun.
- Starcraft Marines 64
Starcraft fanart. 3 Marine models.
- Genji Fan Art 65
Comes with Supported and Unsupported stl. Base made to 3d print lying flat, with supported underbelly.
- 3D Printed one hand book holder 66
This object will simplify your life, allowing you to read your books with one hand and without any thumb cramp !
- Malte Fürstenberg 67
Bananaaaaaa, you will like this cool 3D print. It Can be 3D printed with IN3DTEC full color printing service.
- "Hammered" Patrick! 68
Inspired by Patrick Star, SpongeBob's best friend! Master of the art of doing nothing at all, Patrick is one of the funniest characters ever created! It Can be 3D printed with IN3DTEC full color printing service.
- Ultra swole Pikachu 69
Ultra swole Pikachu! I created this for fun. Sculpted in Zbrush, part separated and repaired with Maya and Meshmixer. Can be 3D printed with IN3DTEC full color printing service.
- Baby Groot flower pot 70
Cool 3D prints and innovate creation
- Lion Ring for comp 71
Lorem ipsum dolor sit amet consectetur adipiscing elit dolor
- Crocodile Ring 72
This design is ideal for 316L Steel 3D printing, with stone polishing. You can find this from IN3DTEC online quote system
- Ring - Folded faces 73
This design is ideal for 316L Steel 3D printing, with stone polishing. You can find this from IN3DTEC online quote system
- Crow's Skull 74
This design is ideal for 316L Steel 3D printing, with stone polishing. You can find this from IN3DTEC online quote system
- Santa and Snowman - Christmas multicolor knitted container 75
Santa is printed in 4 colors with 1 AMS unit. (the belt buckle was painted with yellow acrylic paint, if you have another AMS unit you can add the yellow color).
You can find multiple color printing servcie from IN3DTEC. - Stitch [Lilo and Stitch] 76
Today we're bringing you a 3D printed Stitch from the Disney movie Lilo and Stitch. Stitch is such an iconic character, and it was really fun to make into a full figure.
- CONTROLLER MOUNT (SWITCH/XBOX/PS4/+) - NO SUPPORTS/ONE PIECE 77
Minimalistic design meant to function for most all controller types. Requires no support material and prints in one quick and easy model. Includes both a narrow and wide version. In testing various controllers, some secured a bit nicer to a narrow version. Though the Wide version is the one pictured in the post print images.
- Smaller Print-in-place Massage Roller 78
Ideal for body massage, you can select IN3DTEC printing service for customized colors.
- Cable holder 79
Summary USB cable holder.
- Dummy 13 - version 1.0! 80
Dummy 13 is a 3D printable action figure designed for super expressive articulation and infinite customization, accessible to anyone with a 3D printer.
- Wall hook 81
8 different wall hooks in different size and sturdiness.
-
 Bath Glass Shower Hook 82
A hook for bathroom glass shower available in various glass thickness and width.
- Fluffy birds 83
Have you ever wished for a little companion to keep you company at your desk? Perhaps you’ve just found one! Here’s a fluffy little bird—a robin, but it doesn’t have a name yet. You can print it out and give it a name!
- STomHacks 84
No support required
-
 Wireless Mouse 85
This 3D-printed mouse features a futuristic hollow shell design that showcases its internal structure. The generative design of the shell is something only achievable through 3D printing. Our industrial designers have fully harnessed the advantages of 3D-printed structures to bring you this stunningly crafted mouse.
- Led Lamp 86
This LED lamp project offers two types of 3D printed lampshades. Type A features a hollow and angular design, while Type B showcases textured and wavy patterns. We recommend to select Translucent material by using FDM or SLA 3D printing from IN3DTEC 3D printing service.
- Honeycomb Wall 87
You can connect the basic parts of the wall together. You can connect it also with printable parts which can be used in various ways (you can use it for screwing to the wall, you can use it as a holder for hanger or as a holder for hook).
- 12-hole playable Ocarina 88
As Gabriel_Knight pointed out, it might actually better to print this with the pointy end down, not up, as I initially thought.
- Moon City 2.0 89
This is the latest (2.0) free version of my Moon City
- TT violent tourbillon 90
This is a 3D printed three-axis tourbillon model whose design is inspired by the tourbillon in the Jacob & Co. Twin Turbo Furious watch. A tourbillon is a mechanism used to counteract the effects of gravity within a watch. This sophisticated model includes an escape wheel, a three-axis frame and a base with integrated motor. It operates on the same principle as a traditional tourbillon watch.
- V3 Series - Impossible Penetration Cone 91
This is an updated version of the V3 Series Vortex Thread/Impossible Cone This version is slightly shorter in length, 72mm, and slightly wider, 42mm, and feels better than the original version. Clearances have been optimized and exterior details add to the appeal. NOTE: Cone dimensions are different than other V3 cones I have made
- Infinite Cube 92
Introducing the Infinity Rubik's Cube, a charming fusion of geometry and minimalism! Its 111 mm size brings a touch of modern elegance to any space. Whether it's a centerpiece on your desk, bookshelf or living room, it's more than decoration - it's an engaging conversation piece and a tribute to endless possibilities!
- Cute lizard with movable joints 93
This incredibly cute 3D printed lizard! It's more than just a model; it's a fun-filled project where you can assemble your own colorful friends.
- Cute movable dinosaur 94
Introducing the most charming dinosaur you'll ever meet - the delightfully chubby and irresistibly adorable dino!
With its plump, soft design and fully movable joints, this little creature is not just a decoration; it’s a heartwarming companion that will bring joy to any space. Effortlessly easy to print and impossibly easy to love, this lovable dinosaur is an essential addition to your collection! Don’t miss out on the chance to brighten up your surroundings with its cheerful presence! - Large building blocks * Captain Brick Beard * Pirate * 500% 95
This model is designed for multiple color 3d printing.
- Solar System Lithophane Planet Lamp Collection 96
After more than two years of designing and prototyping, I am very happy to finally present you the Solar System Planet Lamp Collection. In the course of this, I printed over 50 lamp prototypes and spent more than 20 kg of Filament
- BOX OPENER - TESTED 97
Easy to print - Easy to handle Perfect for openeing your boxes
- Articulating Raccoon - No Supports 98
Here is the Raccoon Model! The multicolor and single-color files are included. Even if your slicer isn't compatible with the included 3mf file, the single-color file is designed to be easy to paint in your slicer of choice. Just simply use the fill tool in your slicer to paint the different colors. Enjoy!
- CYBER CAT: UNIVERSAL HEADPHONE HOLDER 99
Let the Cyber Cat Bite Your Headphones! This is the Cyber Cat! A Universal Headphone Holder, with movable jaw and retractable teeth!
- KNITTED SNOWMAN 100
This is a cute knitted Snowman same as your grandma would have knitted for you. This needs no supports to print. No assembly needed after print. Make sure to upload a make after printing. Thank You!
The post 100 Innovative 3D Print Projects You Will Love appeared first on IN3DTEC | Prototyping & On-demand manufacturing services.
]]>